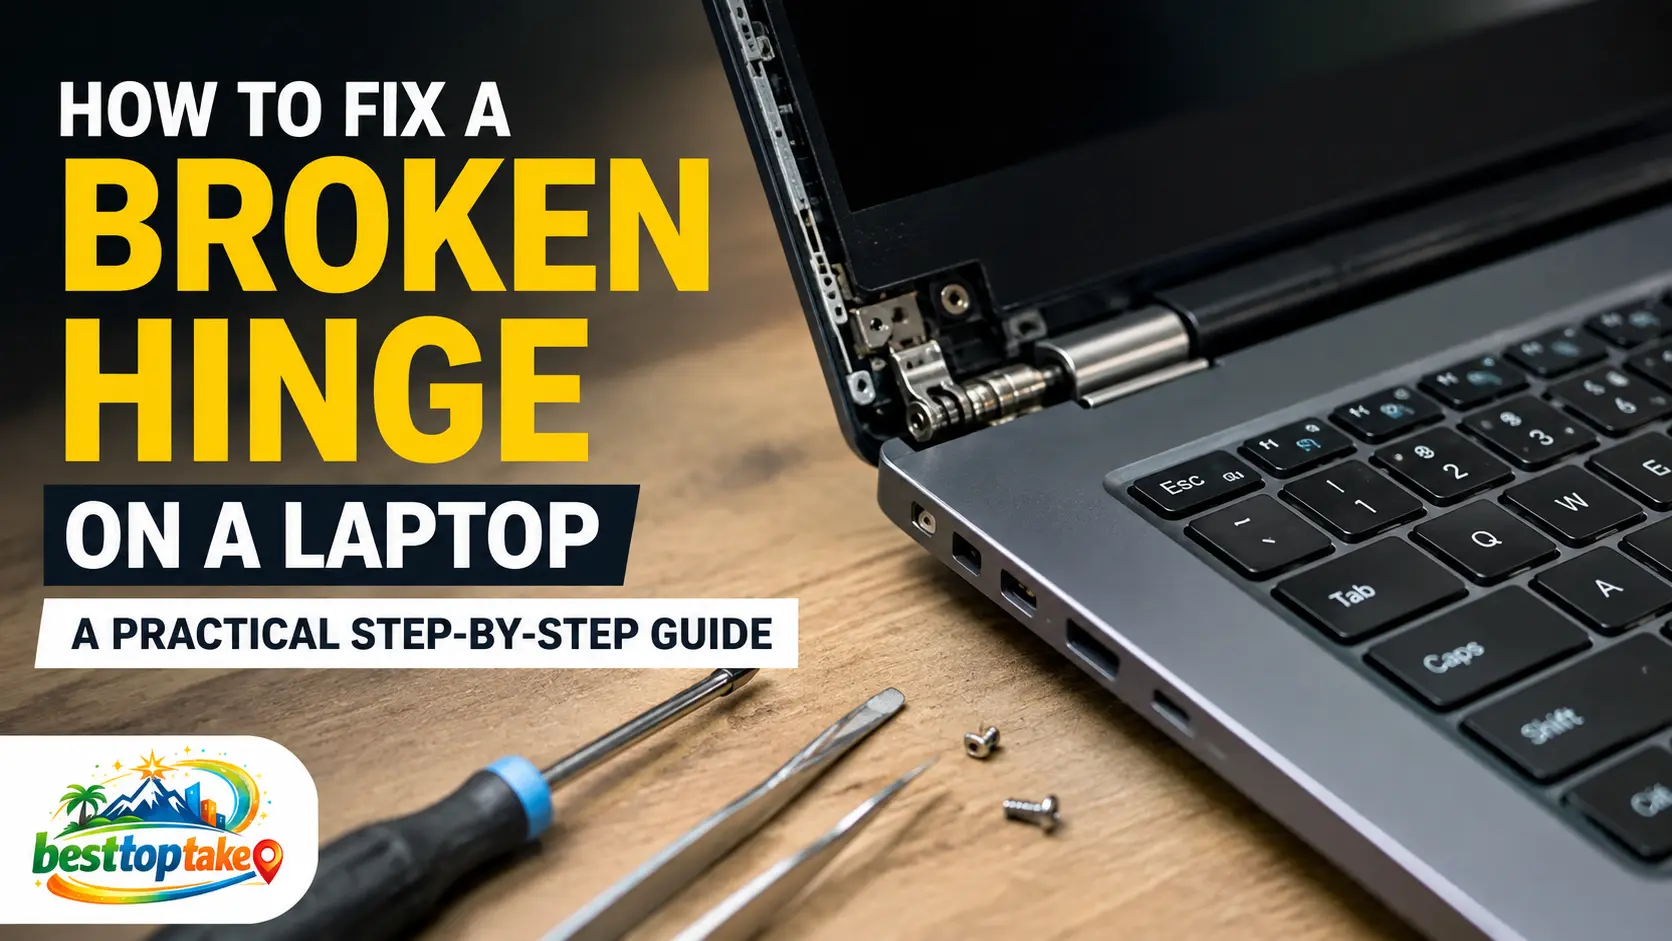
A broken laptop hinge can turn a small inconvenience into a much more expensive repair. The screen may wobble, the casing may start separating, or the lid may make a cracking sound every time you open it.
The good news is that many hinge problems can be repaired. The correct solution, however, depends on what is actually broken. Sometimes the metal hinge has failed. In other cases, the hinge is fine, but the plastic mounting points inside the laptop case have snapped.
This guide explains how to fix a broken hinge on a laptop, how to identify the damaged part, which repair method may work, and when it is safer to take the laptop to a professional technician.
Important: Laptop designs vary significantly. Always look for a service manual or disassembly guide for your exact laptop model before removing any parts.
Can a Broken Laptop Hinge Be Fixed?
Yes, a broken laptop hinge can usually be fixed, but the type of repair depends on the damage.
A loose hinge may only need its screws tightened. A cracked or seized metal hinge usually needs to be replaced. If the plastic screw mounts have broken away from the casing, the damaged housing may need an epoxy repair or complete replacement.
In more serious cases, a broken hinge can also damage the screen cable, antenna wires, webcam cable, display bezel, palmrest, or back cover.
The first step is therefore not to start unscrewing the laptop. It is to identify exactly what has failed.
Stop Using the Hinge Before the Damage Gets Worse
If the casing is separating or the screen feels unstable, avoid repeatedly opening and closing the lid.
Continuing to force a damaged hinge can:
- Pull the display cable out of position
- Crack the screen bezel
- Break additional screw mounts
- Damage the LCD back cover
- Bend the remaining hinge
- Cause the screen to flicker or stop working
- Put pressure on the motherboard-side connectors
Place the laptop on a stable desk and keep the screen in one comfortable position. If possible, connect an external monitor and avoid moving the lid until you can inspect or repair the damage.
Never carry the laptop by holding the screen.
Is the Hinge Broken or Is the Plastic Mount Damaged?
Many people assume that the metal hinge has broken when the real problem is the plastic structure holding it in place.
Use the following table to narrow down the likely cause.
| Symptom | Likely Problem | Possible Repair |
|---|---|---|
| The screen wobbles but the casing looks normal | Loose hinge screws | Tighten the mounting screws |
| The lid is unusually hard to open | Stiff or seized hinge | Adjust or replace the hinge |
| The bottom corner lifts when opening the lid | Broken plastic mounting posts | Repair or replace the casing |
| The metal hinge arm is cracked or bent | Broken metal hinge | Replace the hinge |
| The bezel separates from the screen | Display-side mounting damage | Repair or replace the back cover or bezel |
| The palmrest lifts near the hinge | Broken C-cover mounting points | Replace or reinforce the palmrest assembly |
| The screen flickers when the lid moves | Damaged or pinched display cable | Inspect and replace the cable if needed |
| One side of the screen sits lower than the other | Failed hinge or damaged mounting bracket | Replace the affected hinge and inspect both sides |
A proper diagnosis prevents you from buying the wrong replacement part or applying glue where a structural component should be replaced.
Common Types of Laptop Hinge Damage
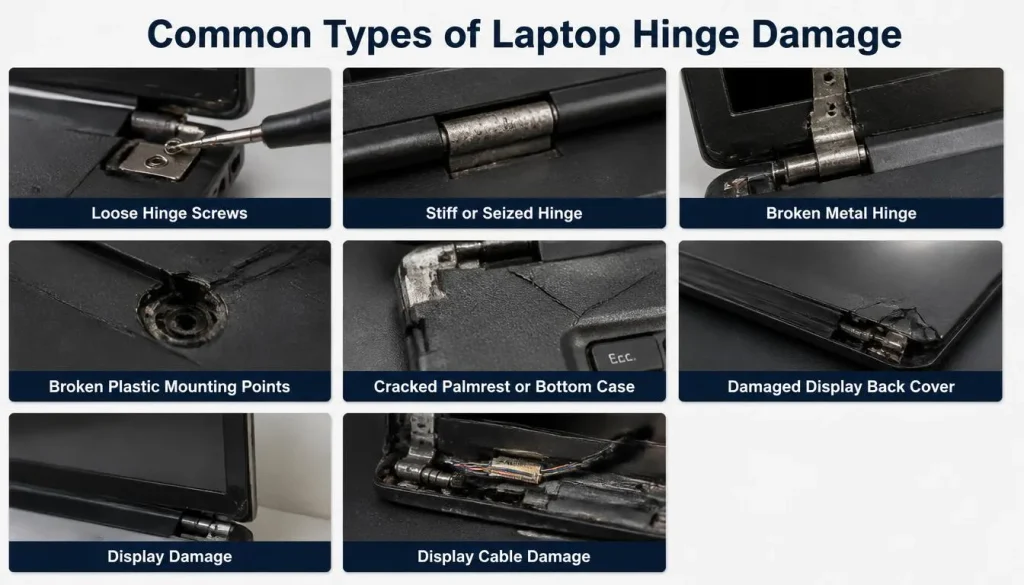
Loose Hinge Screws
The screws holding the hinge to the base or display housing can loosen over time. This usually causes screen wobble without major casing damage.
Loose screws are among the easiest hinge problems to repair, provided the plastic screw posts are still intact.
Stiff or Seized Hinge
A hinge can become extremely tight because of internal wear, corrosion, dirt, or mechanical failure.
When the hinge becomes too stiff, the force required to open the lid transfers into the plastic casing. Eventually, the screw mounts may break even though the metal hinge still looks intact.
Repairing the plastic without addressing the stiff hinge can cause the same damage to happen again.
Broken Metal Hinge
The hinge arm, barrel, or mounting plate may crack, bend, or completely separate. A damaged metal hinge normally needs replacement rather than glue.
Broken Plastic Mounting Points
Most laptop hinges are screwed into threaded metal inserts held inside plastic mounting posts. If the plastic around those inserts breaks, the hinge may pull away from the casing.
Depending on the extent of the damage, the mounting points may be rebuilt with a suitable two-part epoxy. However, replacing the damaged casing usually provides a cleaner and more reliable result.
Cracked Palmrest or Bottom Case
If the base of the laptop opens near the hinge, the damage may be in the upper palmrest assembly or bottom cover.
This is common when the hinge mounting points are built into the keyboard or palmrest housing.
Damaged Display Back Cover
The hinge may also break away from the rear screen housing. In that case, the laptop’s LCD back cover may need replacement.
Display Cable Damage
The display cable normally passes through or close to the hinge area. A broken or displaced hinge can pinch, stretch, or tear the cable.
Possible signs include:
- Screen flickering
- Random black screen
- Colored lines on the display
- Image disappearing at certain lid angles
- Webcam failure
- Wi-Fi or Bluetooth issues caused by damaged antenna wires
If the display changes when you move the lid, stop moving it until the cable has been inspected.
Which Laptop Cover or Part Needs Replacement?
Laptop replacement parts are sometimes described as A, B, C, and D covers. Knowing these terms can make finding the correct part much easier.
A Cover
The A cover is the outer rear panel of the display. It is also called the LCD back cover, display back cover, screen lid, or top lid.
You may need an A-cover replacement if the hinge has pulled away from the back of the screen.
B Cover
The B cover is the bezel around the display.
A damaged bezel may separate, crack, or lift near the hinge. However, the bezel is often only showing the damage. The actual broken mounting points may be behind it.
C Cover
The C cover usually includes the keyboard deck, upper housing, or palmrest assembly.
If the hinge is lifting the keyboard area or palmrest, the broken mounts may be part of the C cover.
D Cover
The D cover is the bottom base cover of the laptop.
It may crack near the hinge, but on many models the main hinge mounts are attached to the C cover rather than the removable bottom panel.
Left and Right Hinges
Laptop hinges are often sold separately as left and right parts or together as a pair. The two sides may have different shapes and part numbers, so check carefully before ordering.
Tools and Materials You May Need
The exact tools depend on the laptop model and the type of damage.
Basic tools may include:
- Precision Phillips screwdriver set
- Torx screwdriver bits
- Plastic opening picks
- Plastic spudger
- Tweezers
- Small containers for screws
- Anti-static wrist strap
- Soft cleaning brush
- Isopropyl alcohol
- Microfiber cloth
- Replacement screws
- Model-specific replacement hinge
- Replacement palmrest or back cover
- Two-part plastic epoxy
- Small clamps
Avoid using a metal knife to pry open the casing. It can damage clips, cut wires, puncture the battery, or scratch internal components.
Before You Begin
Check the Warranty
Opening the laptop or performing an unauthorized repair may affect the warranty. Check the manufacturer’s support terms before proceeding.
If the laptop has accidental damage coverage, contacting the manufacturer may be safer than attempting a home repair.
Back Up Important Files
A hinge repair normally does not affect the storage drive, but internal work always carries some risk.
Back up important files before disassembling the laptop.
Find the Exact Model Number
Do not order parts using only the laptop’s series name.
For example, two laptops with nearly identical names may use different:
- Hinges
- Display housings
- Palmrest assemblies
- Screen sizes
- Touchscreen panels
- Cable layouts
- Screw positions
Look for the full model number, product number, or service tag on the bottom label, in the BIOS, or in the system information menu.
Download a Service Manual
Search for the service manual or hardware maintenance manual for your exact laptop model.
The manual may show:
- Screw locations
- Bottom cover removal
- Battery disconnection
- Display assembly removal
- Hinge screw order
- Cable routing
- Replacement part numbers
Shut Down the Laptop
Turn the laptop off completely. Disconnect the charger, USB devices, memory cards, and all other accessories.
Disconnect the Battery
Remove the external battery if the model has one. For an internal battery, disconnect it as soon as the bottom cover is removed.
Never work near the hinge or display cable while the battery is still connected.
How to Fix a Broken Hinge on a Laptop
The following steps provide a general repair process. The exact disassembly order may be different for your laptop.

Step 1: Keep the Screen Stable
Place the laptop on a flat surface.
If the hinge is severely damaged, support the screen with a stand, box, or soft object. Do not allow the display to fall backward.
Avoid tape directly on the screen surface.
Step 2: Remove the Bottom Cover
Turn the laptop over and remove the visible screws.
Some laptops have hidden screws under rubber feet, labels, or service covers. Keep track of the location and length of every screw.
Use a plastic opening pick to release the case clips. Do not force the panel if it does not lift easily. A missed screw may still be holding it in place.
Step 3: Disconnect the Battery
Locate the battery connector and carefully disconnect it from the motherboard.
Do not pry the connector upward unless the service manual specifically shows that movement. Some connectors slide horizontally.
After disconnecting the battery, press and hold the power button for around 10 seconds to discharge remaining power.
Step 4: Inspect Both Hinge Areas
Check the left and right sides, even if only one side appears damaged.
Look for:
- Loose screws
- Missing screws
- Cracked metal plates
- Bent hinge arms
- Broken plastic posts
- Loose threaded inserts
- Cracked palmrest sections
- Broken display housing
- Pinched cables
- Dust or debris around the hinge
Open or move the lid only as much as necessary.
Step 5: Test Hinge Resistance Carefully
If the hinge has been separated from the casing, gently check whether the metal hinge moves smoothly.
Do not force it with your fingers. Some hinges require substantial resistance by design.
If one hinge is much tighter than the other, feels rough, or cannot move through its normal range, replacement is usually safer than reinstalling it.
Step 6: Select the Correct Repair Method
The correct method depends on the damage:
- Tighten screws if the mounts are undamaged
- Replace a cracked, bent, or seized hinge
- Repair broken plastic posts only when enough structure remains
- Replace the casing if multiple mounting points are destroyed
- Repair or replace the display cable if it has been pinched or torn
Method 1: Tightening a Loose Laptop Hinge
This method is suitable when the hinge and plastic mounts are intact.
Access the Hinge Screws
Depending on the laptop, the hinge screws may be accessible after removing:
- The bottom cover
- The keyboard
- The palmrest
- The display bezel
- The complete display assembly
Follow the service manual rather than guessing.
Check the Mounting Points
Before tightening anything, inspect the plastic around each screw.
If the screw spins without tightening, the threaded insert or plastic post may already be broken.
Tighten the Screws Gradually
Tighten the hinge screws evenly. Do not tighten one screw fully while the others remain loose.
Use controlled pressure. Excessive torque can crack the plastic housing.
If a screw repeatedly loosens and the threads are still healthy, a very small amount of removable thread-locking compound may help. Keep it away from plastic unless the product is confirmed to be compatible.
Test the Lid
Reconnect the battery temporarily if required, support the screen, and test the lid movement before completing reassembly.
The lid should move smoothly without lifting the casing.
Method 2: Replacing a Broken Laptop Hinge
A cracked, bent, rough, or seized hinge should normally be replaced.
Find the Correct Part
Confirm:
- Full laptop model
- Product number
- Display size
- Touchscreen or non-touchscreen configuration
- Left or right hinge
- Hinge pair part number
- Screw position
- Cable routing
Comparing photos can help, but the part number is more reliable than appearance alone.
Remove the Display Assembly if Necessary
Many laptops require the complete screen assembly to be removed before replacing a hinge.
This may involve disconnecting:
- Display cable
- Webcam cable
- Wi-Fi antenna wires
- Touchscreen cable
- Microphone cable
Take clear photos before disconnecting anything. These photos can help during reassembly.
Remove the Damaged Hinge
Support the display and remove the hinge screws gradually.
Do not allow the weight of the screen to pull on the remaining hinge or cable.
Install the Replacement Hinge
Position the replacement hinge and start all screws loosely before tightening them.
Once the hinge is aligned, tighten the screws evenly.
Check that no cable runs underneath the hinge plate.
Test the Movement
Before reinstalling the bezel and covers, slowly move the hinge through part of its normal range.
Stop if the casing flexes, the cable pulls, or the hinge feels unusually stiff.
Should You Replace One Hinge or Both?
You do not always need to replace both hinges.
Replacing only the damaged hinge may be reasonable when:
- The other hinge moves smoothly
- The other side has no cracks
- Both hinges are available separately
- The laptop is relatively new
- The failure was caused by an isolated impact
Replacing both hinges may be better when:
- Both sides feel stiff
- The laptop is old
- The hinges are sold as a matched pair
- One hinge has already placed extra stress on the other
- Both sides show wear
- The replacement pair is inexpensive
Always inspect the plastic mounts on both sides before making a decision.
Method 3: Repairing a Broken Plastic Hinge Mount
A plastic mount repair may work when the threaded inserts have pulled out but the surrounding casing is still mostly intact.
This method requires patience and careful preparation.
Remove Loose Plastic
Remove only completely detached fragments. Do not cut away plastic that may still provide structural support.
Clean the Area
Remove dust, grease, and old adhesive.
Use a small amount of isopropyl alcohol and allow the area to dry completely.
Position the Threaded Inserts
Place the original metal inserts in their correct positions.
Install the hinge and screws loosely as an alignment guide if necessary, but make sure epoxy cannot permanently bond the hinge to the casing.
Apply a Suitable Two-Part Epoxy
Use an epoxy designed to bond hard plastic.
Apply enough material to rebuild the mounting structure without covering:
- Cable channels
- Ventilation openings
- Screw threads
- Battery areas
- Moving hinge parts
- Case clips
Do not apply epoxy directly to the metal hinge joint.
Reinforce the Mount
Where space allows, build the epoxy around the base of the threaded insert rather than placing a small amount only underneath it.
The repair needs a wide bonding area to resist leverage from the hinge.
Clamp and Cure
Hold the inserts in alignment and allow the epoxy to cure fully.
Do not rely only on the surface-dry time. Follow the manufacturer’s full curing instructions.
Using the laptop before the adhesive has fully cured can ruin the repair.
Reinstall Without Over-Tightening
Once cured, reinstall the hinge and tighten the screws carefully.
If the hinge itself is still stiff, replace or service it before using the repaired mount.
Can You Use Super Glue on a Laptop Hinge?
Super glue is generally not the best choice for a structural laptop hinge repair.
Laptop hinges create repeated pulling and twisting forces. Super glue can become brittle and may fail after a small number of opening cycles.
It can also flow into:
- Screw threads
- Case seams
- Display cables
- Keyboard mechanisms
- Hinge joints
Hot glue is also unsuitable for most structural hinge repairs because it can soften with heat and does not provide enough mechanical strength.
A suitable two-part plastic epoxy may provide a stronger repair, but casing replacement remains the more reliable option when the damage is extensive.
Method 4: Replacing the Damaged Casing
Replacing the housing is often the best solution when several screw posts are broken or large sections of plastic are missing.
You may need to replace:
- LCD back cover
- Palmrest assembly
- Keyboard deck
- Bottom base
- Display bezel
- Hinge brackets
- Complete display assembly
Although casing replacement can require more disassembly, it usually restores the original mounting structure more effectively than rebuilding several damaged posts.
Before buying a replacement casing, compare:
- Port positions
- Keyboard layout
- Fingerprint reader opening
- Touchpad design
- Speaker openings
- Display size
- Hinge screw pattern
- Color and finish
Laptop Hinge Repair Methods Compared
| Repair Method | Best For | Expected Durability | Difficulty |
|---|---|---|---|
| Tightening screws | Loose screws with intact mounts | High | Low |
| Replacing one hinge | One damaged metal hinge | High | Medium |
| Replacing both hinges | Worn or stiff hinge pair | High | Medium |
| Two-part epoxy repair | Limited plastic mount damage | Medium to high | Medium |
| Replacing the casing | Severe or widespread mount damage | High | Medium to high |
| Bolt-and-nut modification | Older low-value laptop | Variable | High |
| Tape or temporary support | Emergency use only | Very low | Low |
A bolt-and-nut modification may work on some older laptops, but it requires drilling through the casing and can affect appearance, screen clearance, and structural alignment. It is not recommended for most modern laptops.
How to Reassemble and Test the Laptop
Once the repair is complete, reassemble the laptop slowly.
Route All Cables Correctly
Make sure the display and antenna cables follow their original paths.
A cable trapped under the hinge can fail after only a few lid movements.
Reconnect the Battery
Reconnect the internal battery and check that the connector is fully seated.
Reinstall the Covers
Replace the screws in their original locations. A screw that is too long can damage the keyboard, palmrest, battery, or motherboard.
Open the Lid From the Center
Place one hand on the laptop base and open the screen slowly from the center.
Opening from a corner creates uneven pressure on the hinges.
Check the Display
Look for:
- Flickering
- Lines
- Color changes
- Black screen
- Webcam failure
- Cable movement
- Bezel separation
Test the Full Hinge Range Gradually
Do not immediately force the lid to its maximum angle.
Open and close it through a limited range several times. If everything remains stable, gradually test the normal opening range.
Stop immediately if you hear cracking or see the casing move.
Common Laptop Hinge Repair Mistakes
Avoid these common mistakes:
Ordering Parts by Brand Name Only
“HP Pavilion hinge” or “Lenovo IdeaPad hinge” is not specific enough. Always use the full model and part number.
Ignoring a Stiff Hinge
Repairing the plastic mount without fixing a seized hinge often leads to another failure.
Using Too Much Force
A laptop case that will not open may still have a hidden screw or clip.
Forgetting to Disconnect the Battery
This increases the risk of short circuits and accidental power-on.
Mixing Up the Screws
Laptop screws often have different lengths. Installing a long screw in the wrong position can damage internal parts.
Applying Glue to a Moving Part
Adhesive inside the hinge joint can lock the hinge completely.
Covering Cable Channels With Epoxy
The display or antenna cables may become pinched during reassembly.
Tightening Screws Too Hard
More force does not always make the repair stronger. Over-tightening can crack the repaired mount.
Reassembling Before the Epoxy Cures
A repair may feel solid after a few hours but still lack full strength.
Testing the Lid Without Supporting the Screen
The screen can fall and damage the remaining hinge or display cable.
Temporary Fixes for a Broken Laptop Hinge
Temporary support may help you use the laptop long enough to back up files or arrange a proper repair.
Safer temporary options include:
- Keep the lid in one stable position
- Use an external monitor
- Use a laptop stand to support the screen
- Avoid transporting the laptop while open
- Avoid closing the lid
- Back up important files immediately
Tape may hold a loose bezel temporarily, but it cannot restore the internal structure. Do not treat tape as a permanent hinge repair.
Why Is the Laptop Screen Coming Apart Near the Hinge?
When the screen or casing begins separating near the hinge, the hinge is usually pulling against a broken mounting point.
Possible causes include:
- Cracked LCD back cover
- Broken palmrest posts
- Missing hinge screws
- Seized hinge
- Loose threaded inserts
- Bent hinge bracket
- Previous impact damage
- Incorrect earlier repair
Do not press the casing together while moving the lid. That may trap the display cable or break additional clips.
The laptop needs to be opened and inspected to identify which internal part has failed.
How to Find the Correct Laptop Hinge Part Number
Start with the complete laptop model number.
Then use one or more of the following methods:
- Check the manufacturer’s parts catalogue
- Search the service tag or serial number
- Read the number printed on the original hinge
- Compare the screw pattern
- Check left and right side labels
- Confirm display size
- Confirm touchscreen compatibility
- Compare the display cable route
- Consult an authorized parts supplier
Some sellers use their own stock numbers, so ask for the manufacturer part number whenever possible.
OEM parts may offer a more predictable fit, while good-quality aftermarket parts can be a practical option for older laptops.
Does the Repair Process Differ by Brand?
Yes. The general repair principles are similar, but the disassembly process varies by model.
HP Laptop Hinge Repair
On many HP models, the hinge mounting points are integrated into the palmrest or display back cover. Extensive plastic damage may require replacing the complete housing.
Dell Laptop Hinge Repair
Some Dell laptops provide detailed service manuals. Follow the specified screw order and cable-routing instructions for the exact model.
Lenovo Laptop Hinge Repair
Lenovo models may use a separate hinge bracket, palmrest mount, or display-cover mount. Hardware maintenance manuals are often useful for identifying the correct part.
ASUS Laptop Hinge Repair
On some ASUS laptops, the hinge pulls away from the upper case or display cover. Check both the hinge resistance and the plastic mounting points.
Acer Laptop Hinge Repair
Acer hinge repairs often require careful inspection of the palmrest and rear display housing because the visible crack may not reveal the full damage.
MacBook Hinge Repair
MacBook display hinges are integrated into a compact display assembly. Repairs may require specialized tools and are generally less suitable for first-time DIY work.
Chromebook Hinge Repair
Chromebooks are often inexpensive, so compare the cost of replacement parts and labor with the current value of the device.
Gaming Laptop Hinge Repair
Gaming laptops may have heavier displays and stronger hinge tension. Correct alignment is especially important because the larger screen places more leverage on the mounts.
2-in-1 Laptop Hinge Repair
Convertible laptops use complex 360-degree hinges and tightly routed cables. Professional repair is usually the safer option.
How Much Does It Cost to Fix a Broken Laptop Hinge?
Laptop hinge repair cost depends on the model, labor rate, replacement parts, and extent of the damage.
A simple screw-tightening repair may cost very little. Replacing a hinge, palmrest, back cover, or display assembly can be much more expensive.
Typical cost factors include:
- One hinge versus both hinges
- OEM versus aftermarket parts
- Broken metal hinge
- Broken plastic mount
- Palmrest replacement
- LCD back-cover replacement
- Touchscreen display
- Display cable damage
- Shipping and parts availability
- Local technician labor rates
Repair prices can vary widely across the USA, UK, Canada, and Australia. Request a written quote that separates parts and labor.
Ask whether the quote includes:
- Replacement hinges
- Casing parts
- Display cable inspection
- Reassembly
- Testing
- Repair warranty
Is It Worth Fixing a Broken Laptop Hinge?
Repair is usually worth considering when:
- The laptop still performs well
- The screen is undamaged
- Replacement parts are available
- The repair cost is reasonable
- The laptop contains important software or configuration
- The battery and motherboard are in good condition
Replacing the laptop may make more sense when:
- The device is very old
- The screen is also damaged
- The battery needs replacement
- The motherboard has problems
- Parts are difficult to find
- The repair cost is close to the value of a replacement laptop
- The casing has failed repeatedly
Do not compare the repair cost only with the laptop’s original price. Compare it with the cost of buying a suitable replacement today.
When Should You Take the Laptop to a Professional?
Professional repair is recommended when:
- The screen flickers when moved
- The display cable is torn
- The battery is swollen
- The casing is broken near the motherboard
- Both hinges are severely damaged
- The screen is touchscreen
- The laptop uses a 360-degree hinge
- The laptop is still under warranty
- The correct part cannot be identified
- The display assembly must be fully dismantled
- You do not have suitable tools
- You are uncomfortable disconnecting internal cables
A professional technician can also check whether the hinge problem has damaged other components.
What Causes Laptop Hinges to Break?
Laptop hinges usually fail because of repeated stress rather than a single event.
Common causes include:
- Opening the lid from one corner
- Carrying the laptop by the screen
- Dropping the laptop
- Forcing the lid beyond its normal angle
- Continuing to use a stiff hinge
- Loose screws that were never tightened
- Weak plastic mounting points
- Closing the lid with an object on the keyboard
- Carrying the laptop in an overpacked bag
- Previous poor-quality repair
- Normal wear over many years
A small amount of movement near the hinge should not be ignored. Early repair is often cheaper and easier.
How to Prevent Laptop Hinge Damage
Use these habits to reduce future hinge problems:
- Open the lid from the center
- Use both hands when the hinge feels tight
- Keep the base flat while opening the screen
- Never lift the laptop by the display
- Avoid forcing the screen backward
- Do not place heavy objects on the closed laptop
- Use a protective laptop bag
- Do not overpack the bag
- Check loose screws early
- Stop using the hinge if the casing starts separating
- Keep the hinge area free of dirt
- Have a stiff hinge inspected before the mounts break
Frequently Asked Questions
Can I Fix a Broken Laptop Hinge Myself?
You may be able to repair a loose hinge, replace a basic hinge, or rebuild a limited plastic mount if you have the correct tools and model-specific instructions. Complex display assemblies and severe casing damage are better handled by a technician.
Can a Laptop Hinge Be Repaired Without Replacing It?
A loose hinge may only need tightening. A damaged plastic mount may sometimes be rebuilt. However, a cracked, bent, or seized metal hinge should normally be replaced.
Can I Use Super Glue to Fix a Laptop Hinge?
Super glue is usually too brittle for a permanent structural repair. It can also flow into cables, screw threads, or moving parts. A suitable two-part epoxy is generally stronger for limited plastic damage.
Is Epoxy Safe for Laptop Hinge Repair?
Epoxy can be used carefully on broken plastic mounts when the battery is disconnected and cables are protected. It should not contact the hinge joint, ventilation areas, screw threads, or electrical components.
How Long Does a Laptop Hinge Repair Take?
A simple tightening job may take less than an hour. A full hinge or casing replacement can take several hours, depending on the laptop design. Epoxy repairs also require full curing time before reassembly.
Can a Broken Hinge Damage the Screen?
Yes. A damaged hinge can twist the screen frame, crack the panel, pull the display cable, or damage the bezel and back cover.
Why Does My Screen Flicker When I Move the Lid?
The display cable may be loose, pinched, or damaged near the hinge. Stop moving the lid and have the cable inspected.
Can I Keep Using a Laptop With One Broken Hinge?
Continuing to use it can damage the other hinge, casing, display cable, or screen. Keep the lid stationary and arrange a repair as soon as possible.
Do I Need to Replace the Entire Laptop Case?
Not always. Limited damage may be repaired, but extensive broken mounting posts often require replacement of the palmrest, bottom base, or LCD back cover.
Should I Replace Both Laptop Hinges?
Replace both if they are worn, stiff, or sold as a matched pair. If only one hinge is damaged and the other moves smoothly, replacing one may be enough.
How Do I Know Which Laptop Hinge to Buy?
Use the exact laptop model, product number, screen size, touchscreen configuration, and the part number printed on the original hinge.
Is a Broken Laptop Hinge Covered Under Warranty?
It depends on the warranty and the cause of the damage. Manufacturing defects may be covered, while impact or accidental damage may require additional protection coverage.
Final Thoughts
A broken laptop hinge should be repaired before it damages the screen, cable, or casing further.
Start by identifying whether the problem is a loose screw, stiff hinge, broken metal component, or damaged plastic mount. Tightening screws may solve a minor problem, while a seized hinge or severely broken housing usually needs replacement.
Take your time, use the correct part, disconnect the battery, and follow the service manual for your exact model. Most importantly, do not force a damaged lid. A careful repair today can prevent a much more expensive screen or motherboard repair later.

“Electronics aren’t just gadgets. They’re the invisible threads that connect our work, our play, and our world.”
I’m Julian Reed, and my obsession with tech started at age twelve, when I soldered a defunct gaming console back to life in my bedroom. That tiny green screen taught me that technology isn’t just a black box, it’s a tool you can master.
After fifteen years as a hardware engineer and a decade reviewing consumer tech, I’ve joined this team to cut through the jargon. Whether you’re building a high-end home theater or just need a laptop that won’t lag, I’m here to help you choose the gear that truly powers your life.