Is your laptop barely lasting an hour on a full charge? Does it shut down unexpectedly even when the battery indicator says 30%? You’re not alone. Whether you’re working from a café in London, studying in Toronto, or traveling between Sydney and New York, a dying battery can ruin your productivity.
The good news: replacing a laptop battery is often simpler and cheaper than you think. This guide will walk you through everything from choosing the right battery to doing the swap yourself, troubleshooting common issues, and properly recycling the old one. By the end, you’ll have the confidence to bring your laptop back to life no repair shop required.
When & Why You Need a Laptop Battery Replacement
Signs Your Laptop Battery Needs Replacing
- Rapid discharge: The battery drops from 100% to 10% in under an hour.
- Unexpected shutdowns: The laptop turns off at 20–30% charge without warning.
- Swollen or bulging battery: The trackpad or keyboard is raised; the case looks warped.
- Overheating: The battery area becomes unusually hot during normal use.
- System warnings: Windows or macOS displays “Replace battery” or “Service battery” alerts.
- Battery health report: A generated report (we’ll show you how later) shows capacity well below 50% of design.
Replacement vs. Buying a New Laptop – Cost Comparison
In most cases, a battery replacement costs a fraction of a new laptop. Here’s a rough price range for genuine or high-quality compatible batteries (including labor if you choose a pro):
- USA: $40–$150 (DIY) | $100–$250 (professional)
- UK: £30–£120 | £80–£200
- Canada: CAD 50–180 | CAD 130–300
- Australia: AUD 60–200 | AUD 150–350
New laptops start at $400–$500, so if your machine is otherwise performing well, a battery swap is a smart investment.

What You’ll Learn in This Guide
We cover both externally removable batteries (older models) and modern built‑in batteries. You’ll learn how to pick a safe replacement, the exact tools required, step‑by‑step replacement for major brands, special handling for gaming and 2‑in‑1 devices, post‑replacement calibration, and fixes for common hiccups.
Plus, we give you a full comparison of DIY versus professional service so you can choose what works best for you.
Important Safety Precautions Before You Start
- Power off and unplug. Shut down the laptop completely and remove the charger. For internal batteries, also disconnect any external devices.
- Discharge static electricity. Touch an unpainted metal surface or wear an anti‑static wrist strap. Static can destroy sensitive motherboard components.
- Work in a clean, well‑lit area. A clutter‑free desk with plenty of light prevents you from losing tiny screws.
- Handle swollen batteries with extreme care. A bulging battery contains pressurized, flammable electrolyte. Do not puncture it. If you see swelling, stop using the laptop, take it to a well‑ventilated area away from flammable materials, and proceed carefully with removal. Many local repair shops can safely handle swollen batteries if you’re uncomfortable.
- Keep children and pets away. Small screws, sharp tools, and battery chemicals are hazards.
How to Identify the Correct Replacement Battery for Your Laptop
Finding Your Laptop Model Number
Look for a sticker on the bottom case, inside the battery compartment (if removable), or check within the operating system:
- Windows: Press
Windows + R, typemsinfo32, and note the “System Model” or “Product Name.” - macOS: Click Apple menu > About This Mac > System Report > Model Identifier.
- Chromebook: Usually found on a sticker on the bottom or in Settings > About Chrome OS.
Decoding the Battery Part Number
Flip over the old battery and find its printed part number, often formatted like L16M4PB0 (Lenovo), 45N1113 (ThinkPad), A1405 (MacBook), or HSTNN‑DB7D (HP). Use this code alongside your laptop model to search for a compatible replacement.
OEM vs. Third‑Party vs. Compatible Batteries
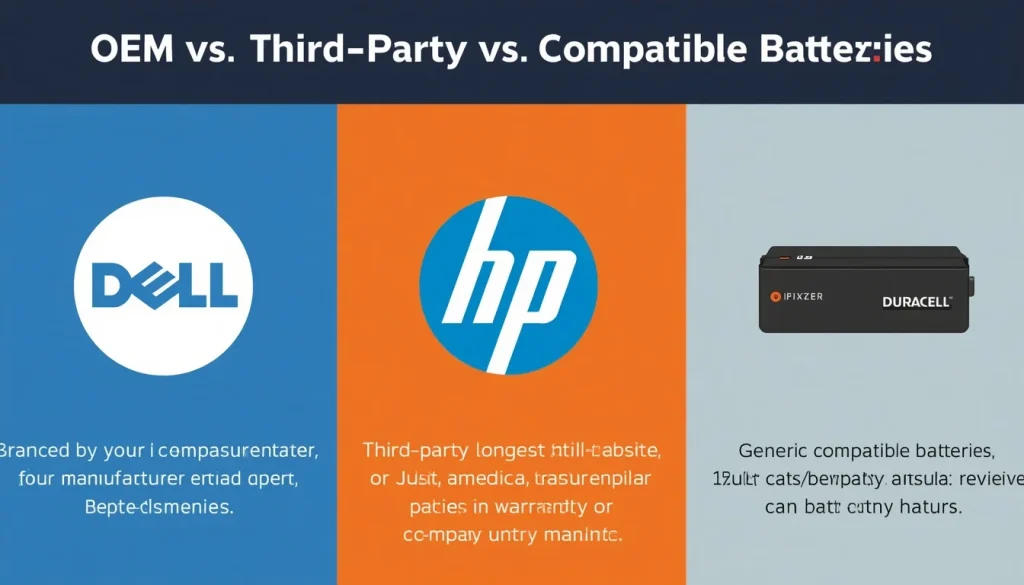
- OEM (Original Equipment Manufacturer): Branded by your laptop maker (Dell, HP, Apple). Highest reliability, longest lifespan, but most expensive. Buy directly from the manufacturer’s website or authorized resellers.
- Third‑party reputable brands: Companies like iFixit, Anker, Cameron Sino, or Duracell Direct. Good balance of quality and price. Check reviews and warranty (at least 12 months).
- Generic compatible batteries: Often sold on Amazon, eBay. The cheapest option but higher risk of poor capacity, early failure, or safety hazards. Only buy if the seller has a long track record of positive reviews and offers easy returns.
Where to buy (region‑specific links to search):
- USA: Amazon.com, Newegg, iFixit.com, Best Buy
- UK: Amazon.co.uk, iFixit UK, DuracellDirect.co.uk, Currys
- Canada: Amazon.ca, BestBuy.ca, Canada Computers
- Australia: Amazon.com.au, iFixit Australia, Centre Com, JB Hi‑Fi
How to Spot a Fake or Defective Replacement Battery
- Price too good to be true (an OEM MacBook battery for $25? Fake).
- Misspellings or poor print quality on the label.
- Weight significantly lighter than the original.
- Connector doesn’t click securely or looks misaligned.
- When connected, the laptop refuses to charge or shows “Battery not recognized.”
- Use a multimeter to check voltage: a battery advertised as 11.1V nominal should read roughly 11–12.5V. A reading near zero means the battery is dead on arrival.
Voltage, Watt‑hour (Wh), and Connector Compatibility
Match the voltage and Wh rating as closely as possible. A slightly higher Wh (e.g., 60Wh instead of 48Wh) is acceptable and extends runtime. Never use a battery with a different voltage. Also, ensure the connector shape and pin count matches; some models changed connectors mid‑cycle.
Tools You’ll Need for the Job
Basic Toolkit
- Small Phillips screwdriver (#00 or #000)
- Plastic pry tools (guitar picks, spudger)
- Tweezers (for small screws and connectors)
- Anti‑static wrist strap (recommended)
Optional but Helpful
- Magnetic project mat (to organize screws)
- Suction cup (for detaching screens on 2‑in‑1 devices)
- Pentalobe screwdriver (for newer MacBooks)
- Torx T5 screwdriver (some HPs, ThinkPads)
- Isopropyl alcohol and cotton swabs (to remove adhesive residue)
Battery Connector Safety
Internal batteries connect to the motherboard via delicate connectors. The most common types:
- Pull‑tab: A small plastic tab you gently pull upwards to disconnect.
- Slide‑lock: A metal clip you slide horizontally to release.
- ZIF (Zero Insertion Force): A small lever that flips up, allowing the flat cable to slide out.
Always disconnect the battery connector first after opening the case, and reconnect it last before closing. Never use metal tools on the connector; a plastic spudger is safer.
Step-by-Step Laptop Battery Replacement Methods
Below we cover the two main battery types. If your model doesn’t fit neatly into one category, consult your laptop’s service manual (search “[model] service manual PDF”).
Type 1 – Externally Removable Battery (Older Models)
Many older Dell Latitude, ThinkPad T/X series, and budget laptops have batteries that slide out without opening the case.
- Shut down and unplug the laptop.
- Slide the release latch(es) — some have a spring‑loaded lock.
- Gently pull the battery out.
- Align the new battery connectors and slide it in until it clicks.
- Power on and let the battery charge fully.

Type 2 – Built‑in Internal Battery (Modern Ultrabooks & MacBooks)
This covers most laptops from 2016 onwards, including Dell XPS, HP Spectre, MacBook Air/Pro, Lenovo IdeaPad, and many others.
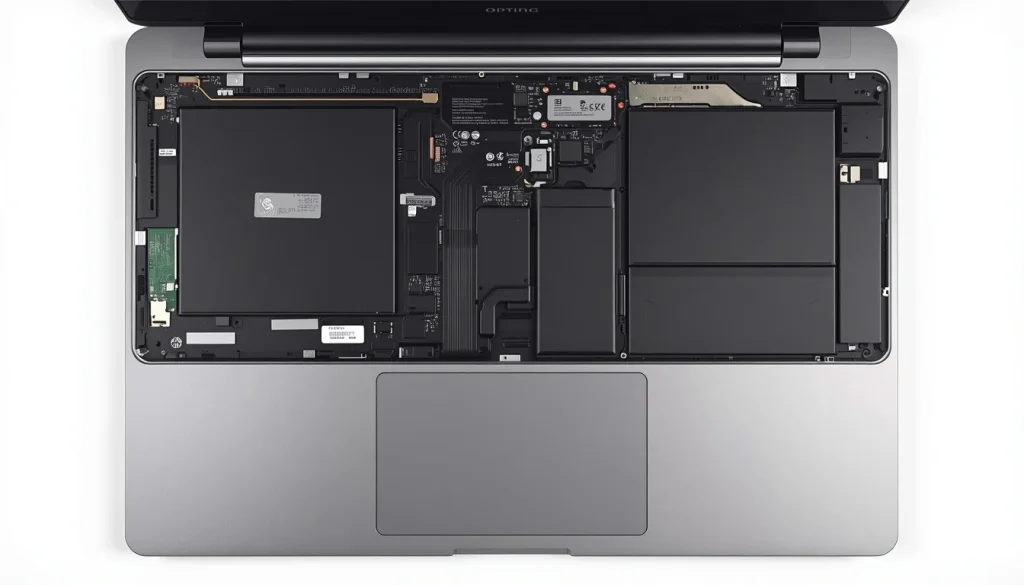
- Turn off, unplug, and remove bottom screws. Keep them arranged in order; screw lengths often differ.
- Use a plastic pry tool to carefully separate the bottom case. Start from a corner and work around the perimeter.
- Disconnect the battery connector from the motherboard first. Use a spudger—do not pull by the wires.
- Remove any screws securing the battery. If the battery is glued (common in MacBooks), apply a few drops of isopropyl alcohol under the cells and gently pry after a minute.
- Lift the old battery out. Place the new battery in position.
- Screw in the new battery and reconnect the connector. Ensure it clicks or seats fully.
- Reattach the bottom case, tighten all screws, power on, and charge to 100%.
Brand‑Specific Walkthroughs (Key Tips)
- Dell XPS / Inspiron: Bottom case is extremely tight; start prying near the hinges. Battery connector is a small plastic tab.
- HP Spectre / Pavilion: Many use a pull‑tab battery connector. Carefully remove the rubber feet—some hide screws.
- Lenovo ThinkPad: Often have a slide‑lock connector. May need to disable the internal battery in BIOS first (press F1 at startup > Config > Power > Disable built‑in battery).
- MacBook Air / Pro (Retina): Use a pentalobe screwdriver. Batteries are glued—proceed slowly with adhesive remover. Don’t puncture the battery.
- ASUS / Acer: Back panel clips are delicate; use a plastic opening tool. Some Acer models have an “emergency reset” pinhole on the bottom—use it after replacement.
DIY vs. Professional Battery Replacement – Which Is Right for You?
| Factor | DIY Replacement | Professional Service |
|---|---|---|
| Cost | Parts only (see prices above) | Parts + labor ($50–$100 extra) |
| Time | 15 minutes (removable) to 1 hour (glued) | Same‑day or next‑day drop‑off |
| Risk | Accidental damage if not careful | Warranty on work, but may use lower‑quality battery |
| Warranty on battery | Depends on seller; typically 12 months | Typically 90 days to 1 year from shop |
| Best for | Comfortable with basic tools, out‑of‑warranty laptops | Swollen battery, glued battery discomfort, warranty‑void concerns |
If you choose a pro, search for “laptop battery replacement near me” or check authorized service centers (Apple Genius Bar, Best Buy Geek Squad in USA, Currys in UK, Canada Computers, etc.). Always ask what brand of battery they will use.
Replacing Batteries in Gaming Laptops & 2‑in‑1 Devices
Gaming Laptops (Alienware, ASUS ROG, MSI, Acer Predator)
These often have larger batteries with multiple cells, additional cooling tubes, and complex disassembly. The battery may be located under the motherboard or secured by extra screws under a shield. Key tips:
- Consult a disassembly video specific to your exact model.
- Note the location of thermal pads; do not disturb them.
- After replacement, calibrate the battery and check gaming temperatures, as some models use the battery as part of the thermal design.
2‑in‑1 Detachables (Microsoft Surface Pro, Lenovo Yoga detachable)
These are among the hardest to repair because the screen is glued to the frame. Replacing the battery involves heating the screen edges with a heat gun or iOpener, prying up the display with a suction cup, and carefully disconnecting delicate flex cables a risky process that can crack the screen.
Unless you have experience, a professional repair is strongly recommended. If you proceed, buy a screen adhesive kit for resealing.
After Replacement – First Steps & Calibration
Initial Charge Cycle
Plug in the charger and let the laptop charge uninterrupted to 100%. Leave it plugged in for another 2 hours after reaching full charge. This allows the battery management system (BMS) to sync with the new cells.
How to Calibrate Your New Laptop Battery
A calibration helps the operating system accurately estimate remaining runtime.
- Charge to 100% and keep plugged in for two hours.
- Unplug and use the laptop normally until it hibernates or shuts down due to low battery (5% or less).
- Without turning it on, plug it back in and charge fully to 100% again (with the laptop off or on is fine).
Repeat this full discharge cycle once every 1–2 months for best accuracy.
Updating Battery Drivers & BIOS
- Windows: Open Device Manager > Batteries, right‑click “Microsoft ACPI‑Compliant Control Method Battery” and uninstall it (do not worry, it reinstalls on restart). Then check your laptop manufacturer’s support site for BIOS and battery firmware updates.
- macOS: System updates often include battery management fixes. After replacement, do a PRAM/NVRAM reset (Intel Macs) by pressing
Option + Command + P + Rduring startup.
Checking Battery Health Report
- Windows: Open Command Prompt and type
powercfg /batteryreport— an HTML file is saved in your user folder showing design capacity vs full charge capacity. - macOS: Hold
Optionand click Apple menu > System Information > Power. Look at Cycle Count and Condition. - Third‑party tools: BatteryInfoView (Windows, free) or coconutBattery (macOS, free) give real‑time stats.
Troubleshooting Common Post‑Replacement Issues
Laptop Not Turning On After Battery Change
- Perform a hard reset (power drain): Disconnect the charger, remove the battery (if external) or disconnect internal battery, then hold the power button for 30 seconds. Reconnect battery and charger, then try again.
- Recheck that the battery connector is fully seated.
- Reseat the RAM and storage drive — they might have been knocked loose.
“Plugged in, Not Charging” Error – Step‑by‑Step Fix
- Uninstall the battery driver as described above and restart.
- Run Windows Power Troubleshooter: Settings > System > Troubleshoot > Other troubleshooters > Power.
- Perform a hard reset as above.
- Update BIOS from the manufacturer’s website.
- If using a USB‑C charger, ensure it supplies enough wattage for your model.
- Try a different compatible charger if possible.
Battery Drains Too Fast
- Allow a few charge cycles for the BMS to calibrate — initial drain can be erratic.
- Check for background apps: Chrome tabs, Dropbox syncing, etc.
- Lower screen brightness and enable battery saver mode.
- If drain persists after 5–10 cycles, the battery may be defective; contact the seller.
Laptop Doesn’t Recognize the New Battery
- Disconnect and reconnect the battery connector.
- In BIOS/UEFI, look for a “battery reset” option.
- Try an Embedded Controller (EC) reset: Some brands (Dell, Lenovo) have specific key combinations. Search your model + “EC reset.”
How to Dispose of Your Old Laptop Battery Responsibly
Never throw lithium‑ion batteries in household trash — they can cause fires. Here’s how to recycle them in your region:
- USA: Call2Recycle drop‑off points (Best Buy, Lowe’s, Staples). Many municipalities have e‑waste collection days.
- UK: Currys PC World, local council household waste recycling centres, or Recycle Your Electricals website.
- Canada: Call2Recycle bins at Best Buy, Staples, Canadian Tire, and many public libraries.
- Australia: Battery World, Aldi stores, Officeworks, or local council e‑waste events.
Frequently Asked Questions About Laptop Battery Replacement Guide
Can I replace my laptop battery myself?
Yes, most users with patience and a basic screwdriver can handle a removable or internal battery. Glued batteries and 2‑in‑1 devices require more skill.
How much does a laptop battery replacement cost?
DIY: $30–$200 depending on model and OEM status. Professional: $80–$300. Prices vary by country (see cost section above).
How long does it take to replace a laptop battery?
A removable battery takes 5 minutes. A typical internal battery: 20–45 minutes. Glued MacBook batteries or 2‑in‑1 screens can take 1–2 hours.
What warranty do replacement batteries come with?
Reputable sellers offer 12‑month warranties. Some generic batteries carry 3–6 months. Always check before buying.
Will replacing the battery void my warranty?
In the US, the Magnuson‑Moss Warranty Act protects your right to use non‑OEM parts unless the manufacturer proves the part caused damage. Similar “right to repair” principles apply in other regions, but Apple has historically restricted third‑party battery replacements. If your laptop is under warranty, consider using an authorized service center to avoid any dispute.
Is it safe to use a non‑OEM battery?
Yes, if you buy from a well‑reviewed brand with proper safety certifications (CE, UL, RoHS). Avoid the cheapest options.
How do I safely disconnect a fragile battery connector?
Use a plastic spudger and apply even pressure. Never pull by the wires. For slide‑lock connectors, move the metal clip sideways before lifting. For ZIF connectors, flip the black tab upward, then slide the cable out.
Can I replace the battery in my gaming laptop myself?
Many gaming laptops allow replacement, but the process may involve removing extra shields, fans, or even the motherboard. Follow model‑specific tutorials closely.
Conclusion – Extend Your New Battery’s Lifespan
You’ve successfully revived your laptop! To keep the new battery healthy:
- Avoid extreme temperatures. Don’t leave the laptop in a hot car or direct sunlight.
- Partial charges are fine. Lithium‑ion prefers a charge between 20% and 80% for daily use.
- Store properly if not using. If storing for weeks, keep the battery around 50% and in a cool place.
- Use battery‑saver modes when traveling. Windows Battery Saver and macOS Low Power Mode help.
Found this guide helpful? Share it with a friend who’s struggling with a dying laptop battery. Have questions or a specific model we didn’t cover? Drop a comment below, and we’ll try to help. Your laptop is now ready for all those coffee‑shop workdays and cross‑continent flights again!

“Electronics aren’t just gadgets. They’re the invisible threads that connect our work, our play, and our world.”
I’m Julian Reed, and my obsession with tech started at age twelve, when I soldered a defunct gaming console back to life in my bedroom. That tiny green screen taught me that technology isn’t just a black box, it’s a tool you can master.
After fifteen years as a hardware engineer and a decade reviewing consumer tech, I’ve joined this team to cut through the jargon. Whether you’re building a high-end home theater or just need a laptop that won’t lag, I’m here to help you choose the gear that truly powers your life.